
Okay, so today I’m gonna walk you through a little project I tackled over the weekend – exhaust pipe wrapping. Figured I’d share how it went, the good, the bad, and the slightly itchy.
Getting Started with the Wrap
First things first, I had this roll of exhaust wrap I’d ordered online. Nothing fancy, just your standard stuff, and a bunch of those stainless steel locking ties. You definitely need those. I’d heard mixed things about whether to soak the wrap or not. Some say yes, makes it more pliable, some say no, it’s fine dry. I decided to go for the soak. Filled up a bucket with water and chucked the roll in there for a bit. Seemed to make sense, thought it might help it conform better.
While that was soaking, I gave the exhaust pipe a good clean. Mine was already off the bike, which, let me tell you, makes this job a whole lot easier. If you can take your pipe off, do it. Wrestling with it under the bike is just asking for a bad time and scraped knuckles.
The Wrapping Process Itself
Alright, so with the pipe clean and the wrap good and wet, I pulled on some gloves. Important tip: this stuff can be super itchy, especially the fiberglass kind. Don’t skip the gloves. And maybe a long-sleeve shirt.
I started at the header end, the part closest to the engine. Unrolled a bit of the wrap and made my first loop. To secure it, I used one of those stainless steel ties. Pulled it as tight as I possibly could with some pliers. You want that starting point to be solid.
Then, it was just a matter of wrapping. I aimed for about a quarter-inch overlap with each pass. The key here is to keep the tension consistent and tight. If it’s loose, it’s gonna look sloppy and probably won’t do its job as well. The wetness did help it stretch and conform around the bends, I think. I just kept going, spiraling my way down the pipe.

- Kept pulling tight with every wrap.
- Made sure the overlap was pretty even.
- When I got to a bend, I had to kind of adjust the angle and overlap a bit more carefully to keep it smooth.
When I got to the end of the pipe, or where I wanted to stop wrapping, I did a couple of extra tight wraps and then secured it with another stainless steel tie. Trimmed off the excess wrap. Then, I went back and added a few more ties along the length of the pipe, especially at the beginning and end of any bends, just for good measure. You can’t really have too many ties, within reason.
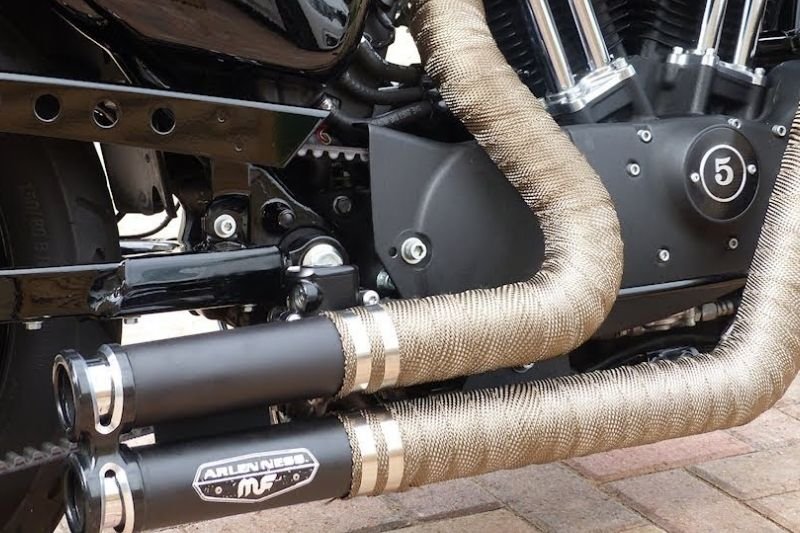
The Aftermath and First Run
Stepping back, it looked pretty decent. Took a bit of patience, but not too bad. The real fun started when I reinstalled the pipe and fired up the engine for the first time.
Be warned: it’s gonna smoke. A lot. And it’s gonna stink. This is normal. The wrap is curing, burning off all the binders and whatever else is in there from manufacturing. I let it run outside for a good 15-20 minutes. The smoke eventually died down, and the smell faded. The wrap also tightens up a bit more as it dries and cures with the heat.
Overall, pretty satisfied with how it turned out. It’s a bit of a messy job, especially with the wet wrap, but taking your time and keeping it tight is the way to go. It definitely changed the look, and hopefully, it’s doing its job with the heat. We’ll see how it holds up over time!