
So, I got this idea in my head a while back, thought my sports bike could use a bit more personality. You know, make it feel a little more ‘mine’. Decided stickers were the way to go. Nothing too crazy, just something to spice it up.
Getting Started: Finding the Right Look
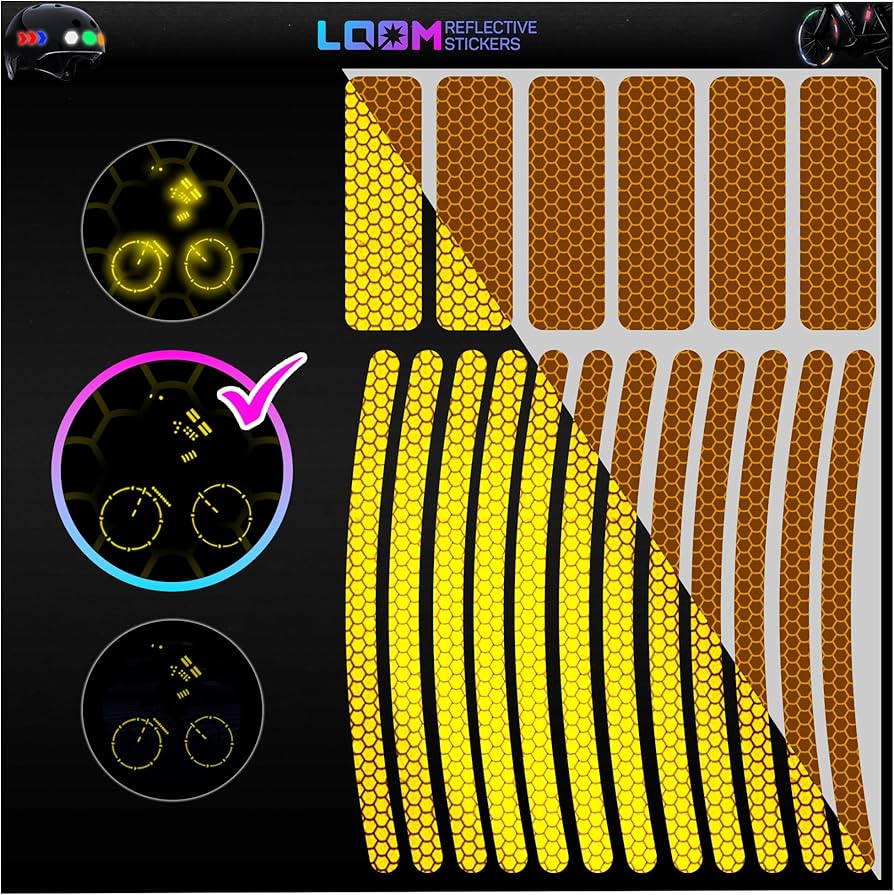
First step was actually finding the stickers. Spent a fair bit of time just looking around online. Lots of options out there, maybe too many. Didn’t want anything massive or super loud. I was thinking more along the lines of some nice wheel stripes, maybe a subtle tank pad sticker too. Found a set that looked pretty decent – some reflective rim tape and a carbon-look tank protector. Ordered them up.
Prep Work is Key
When the stickers arrived, I didn’t just slap ’em on. Learned that lesson the hard way before with other stuff. You gotta prep the surface properly. So, I gave the bike a good wash, paying extra attention to the wheel rims and the tank area where the stickers would go. Used some basic soap and water, then rinsed it off real good.
Then came the drying part. This is important. Left it out in the sun for a bit, then went over the specific spots with a clean microfiber cloth. Had to make sure there was absolutely no dust, no grease, no water left. Bone dry. Otherwise, the stickers just won’t stick right, or they’ll peel off later.
Applying the Stickers: Slow and Steady
Alright, time for the main event. Started with the rim tape. Unrolled the first section. The trick here is not to rush. I carefully lined up the edge of the tape with the rim. Peeled back just a little bit of the backing paper at first. Stuck the starting point down firmly.
Then, slowly, I pulled off more backing while pressing the tape onto the rim with my thumb, following the curve. Tried to keep it smooth and avoid bubbles. If I saw a bubble forming, I’d lift the tape slightly and try again. For the tricky bits, I used an old plastic card, like a credit card, to help smooth it down evenly and push out any tiny air pockets. Did this all the way around both wheels. Took a while, gotta be patient.
- Cleaned the surface thoroughly.
- Dried it completely.
- Lined up the sticker carefully.
- Applied slowly, smoothing as I went.
- Used a plastic card for stubborn bubbles.
Next was the tank protector. Same process really. Figured out exactly where I wanted it. Cleaned that spot one last time just in case. Peeled the backing off the tank sticker. Positioned it carefully over the tank, making sure it was centered. Once I was happy with the position, I pressed it down firmly, starting from the middle and working my way out to the edges. Rubbed it down good to make sure it had full contact.
The Final Look
Finished! Stepped back and took a look. Yeah, I was pretty pleased. The rim tapes give the wheels a nice subtle highlight, especially when light hits them. The tank protector looks clean and should hopefully stop my jacket zipper scratching the paintwork. It’s not a massive transformation, but it definitely adds that little custom touch I was looking for. Makes the bike feel a bit more unique, a bit more me. Simple job, but satisfying when you do it yourself.