
Okay, let’s talk about painting a motorcycle tank. It’s something I tackled a while back, and folks always ask what’s the “best” paint. Honestly, it’s not always a simple answer, but I’ll walk you through what I did and what I found out.
Starting the Journey: Deciding to Repaint
My old tank was looking pretty rough. Scratches, a bit of fading, you know the drill. I figured, why not try painting it myself? I’d done some spray painting before, but a motorcycle tank felt like a bigger deal. It’s right there, front and center, so it had to look decent. I spent a good bit of time just looking at it, figuring out the plan.
Prep Work: The Most Important Part, No Kidding
Everyone says prep is key, and they ain’t lying. This part took me the longest, but I knew if I messed this up, no paint, no matter how good, would save it.
- Stripping (or not): My original paint was actually okay in most spots, just ugly. So I decided against a full strip down to bare metal. Instead, I focused on getting a smooth surface. If you’ve got rust or peeling paint, you gotta strip it. I used a decent amount of sandpaper, starting with a coarser grit to knock down any major imperfections and then moving to finer grits. I think I went up to around 400-grit wet sanding before primer.
- Cleaning: After all that sanding, the tank was dusty. I wiped it down really well with a tack cloth. Then, I used a good wax and grease remover. You absolutely have to get every bit of oil or silicone off it, or the paint will fisheye, and you’ll be starting over. I wiped it, let it flash off, then wiped it again. Twice, just to be sure.
- Masking: I carefully masked off the fuel filler neck and any mounting points. Good quality painter’s tape is your friend here. I made sure the edges were pressed down super tight.
Primer Time: Getting a Good Base
I went with a good quality automotive primer. Some people say epoxy primer is the way to go, especially on bare metal, for adhesion and rust protection. Since I was painting over a well-scuffed original finish, I used a high-build primer surfacer. This stuff is great because it can fill in tiny scratches. I did a couple of light coats, then a couple of medium wet coats. Waited for it to dry properly – patience is a virtue here, seriously. Then, I wet-sanded the primer smooth, again with a fine grit paper, maybe 600-grit. Cleaned it all off again. You get the idea, lots of cleaning.
Choosing the Color and Clear: My Big Decision
Now, for the actual paint. I looked at a few options. Just regular rattle cans from the hardware store? Nah, probably not durable enough for gas spills and general wear. Professional automotive paint and a spray gun? Bit too much investment for me at the time, and I don’t have a proper spray booth.
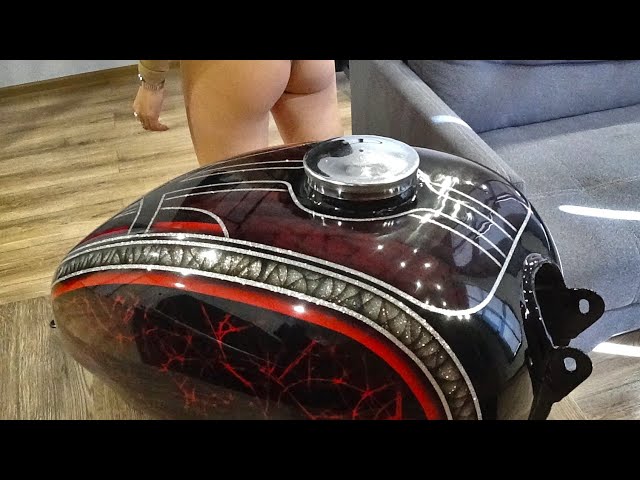
I ended up going with a 2K (two-part) aerosol system. This stuff has the paint and a hardener in the can, you activate it, and then you’ve got a limited time to use it. It’s way more durable than standard 1K rattle cans. For the color, I just picked a nice gloss black base coat from an automotive paint supplier – they can mix it and put it in an aerosol can for you. Then, for the clear coat, I used a 2K aerosol clear. This was the crucial bit for me. That 2K clear is tough, resistant to gas, and gives a really good shine if you do it right.
Laying Down the Color and Clear: The Fun (and Nerve-Wracking) Part
I set up a clean, well-ventilated space. Hung the tank so I could get to all sides easily.
First, the base coat. I did several light coats, letting each one tack up for about 10-15 minutes. You don’t want runs. Just build it up slowly. Once I had good coverage, I let it dry according to the can’s instructions.
Then came the 2K clear. This is where you get the gloss. Again, multiple coats. The first one was a light tack coat. Then I followed up with a couple of wetter coats. You have to be careful here – too light and it’s orange-peely, too heavy and it runs. I got a small run, not gonna lie, but I managed to deal with it later. I let that clear coat cure for a good few days. The longer the better, really, especially before you handle it too much or try to polish it.
The Finish Line: What “Best” Meant for Me
After it was fully cured, I noticed that small run and a little bit of orange peel in a spot or two. So, I very carefully wet-sanded those areas with super fine grit sandpaper (like 1500, then 2000 grit). Then I used a rubbing compound and then a polishing compound to bring back the shine. Took some elbow grease, but it came out looking pretty darn good.
So, what’s the “best” paint? For me, for that project, the automotive base coat with a 2K aerosol clear coat was the winner. It gave me a durable, glossy finish without needing a professional spray gun setup. It wasn’t the absolute cheapest, but it was a good balance of quality, durability, and ease of use for a DIYer. The key was taking my time with the prep and being patient with the application and curing.
If I were doing it all the time, or if I wanted a show-quality, multi-color custom job, I’d probably invest in a proper HVLP gun and professional paints. But for a solid, good-looking, and tough single-color job, the 2K aerosol route worked out great for me. The tank still looks good today, holds up to the odd fuel dribble, and I get a bit of pride knowing I did it myself. That’s what matters, right?