
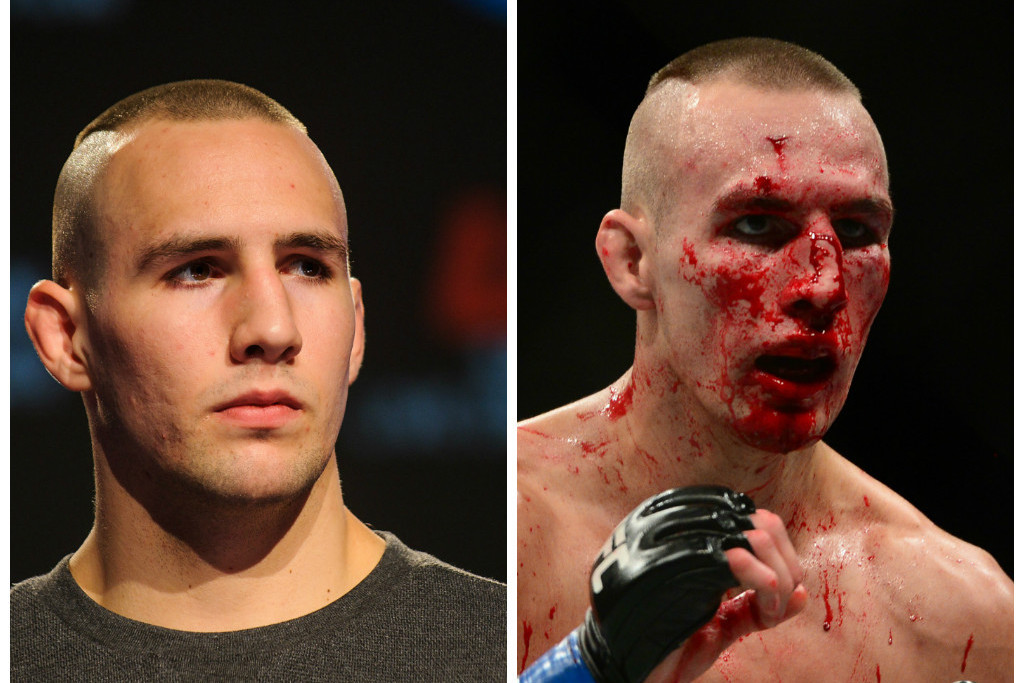
Okay, so I saw this picture of Robbie Lawler all cut up, and I thought, “I gotta try to recreate that digitally!” So, here’s how the whole thing went down.
Finding the Right Picture
First things first, I needed a good picture of Robbie. I did some digging around.I wanted something with good lighting and a clear view of his face, especially the cuts.I finally found a good one – you know, the one where he looks totally beat up but still fierce?
Getting Started with Editing
I use is pixlr. It’s is free and do what l * I uploaded the picture into that.I started with a fresh file.
Making the Cuts
This was the tricky part. I tried a few different things.
- First, I made the line with red color brush.
- I try add the shadow with black color.
- It’s look not good,So l try to use the smudge tool.It’s working!
- Looks real!
I wanted them to look deep and nasty, not just like red lines on his face. I had to go back and forth a few times, erasing and redoing until I got it right.
Adding Some Blood
No cut is complete without some blood, right? So, I grabbed a slightly darker red and started adding some drips and smears.I try to put some blood on the line.
And I used a smaller brush size to add some tiny splatters around the cuts. Made it look more… convincing.
Finishing Touches
Once the cuts and blood were done, I zoomed out to see the whole thing.
I was pretty stoked with how it turned out! It looked like Robbie Lawler had just gone a few rounds, all thanks to some digital magic.
It’s not perfect, but it’s a fun little project. And who knows, maybe I’ll try doing more of these in the future!