Alright, let’s talk about getting this old Shovelhead back into shape. It wasn’t exactly a basket case when I got it, but it definitely needed some serious attention. Sat for who knows how long.
Getting Started – The Teardown
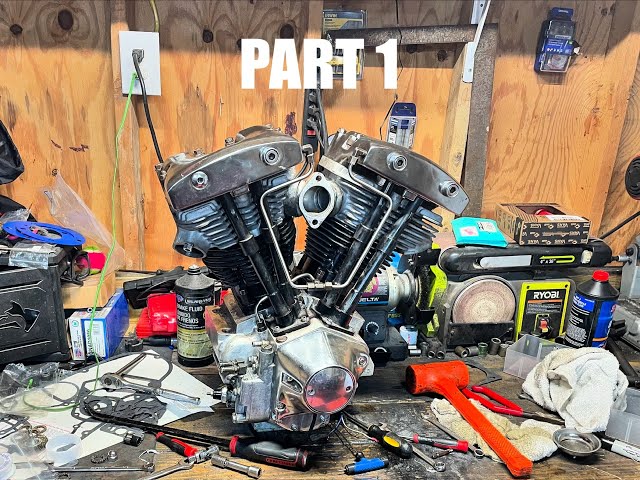
First thing was getting it onto the bench. Heavy lump, that. Then, the fun part: taking it all apart. I started pulling the tins off, then the carb, intake, and exhaust. Pretty straightforward stuff. Then came the top end. Pulled the rocker boxes, those came off easy enough. Then the heads. Man, those head bolts were tight. Had to use a breaker bar on a couple of them. Finally got ’em loose. Lifted the heads off, set ’em aside.
Next up were the cylinders, or jugs, whatever you wanna call ’em. Slid those off. Pistons looked okay-ish at first glance, but definitely showed some wear. Lots of carbon buildup everywhere. Then I moved to the bottom end. Didn’t split the cases on this one initially, wanted to see how things looked first. Drained the old oil – nasty stuff.
Inspection and Cleaning Time
Laid everything out. Spent a good long while just looking things over. One cylinder had some light scoring, nothing too deep, thankfully. Heads looked decent, valves needed a good cleaning and maybe lapping. The pistons confirmed my initial thought – time for new ones, or at least new rings. Cleaned everything meticulously. Used gallons of degreaser, wire brushes, scrapers. It’s tedious work, but you gotta do it right. Got everything as clean as I could get it.
- Cleaned rocker boxes
- Scraped gasket surfaces
- Cleaned heads and combustion chambers
- Washed down the jugs
- Cleaned the pistons (before deciding to replace)
Decided to get the cylinders honed lightly just to clean them up and get a good surface for the new rings. Sent them off to a local guy I trust.
Parts and Putting It Back Together
While the jugs were out, I started gathering parts. New pistons, rings, wrist pins. Got a full gasket set, of course. New valve seals for the heads. Cleaned up the valves, lapped them in myself. Took my time. Checked the pushrods, they were straight, so just cleaned those up.

Once I got the cylinders back, it was assembly time. Carefully installed the new pistons onto the rods. Oiled up the new rings, staggered them just right. Gently compressed the rings and slid the cleaned-up jugs back over the pistons. This part always makes me nervous, don’t wanna break a ring. Got them seated down. Torqued the base nuts. Put the heads back on with new gaskets. Torqued down the head bolts in the right sequence. That’s important.
Installed the pushrods, making sure they were seated correctly. Put the rocker boxes back on with new gaskets. Adjusted the pushrods. This always takes some fiddling to get just right. You gotta have the engine at the right spot in its rotation for each one.
Finishing Touches and Fire Up
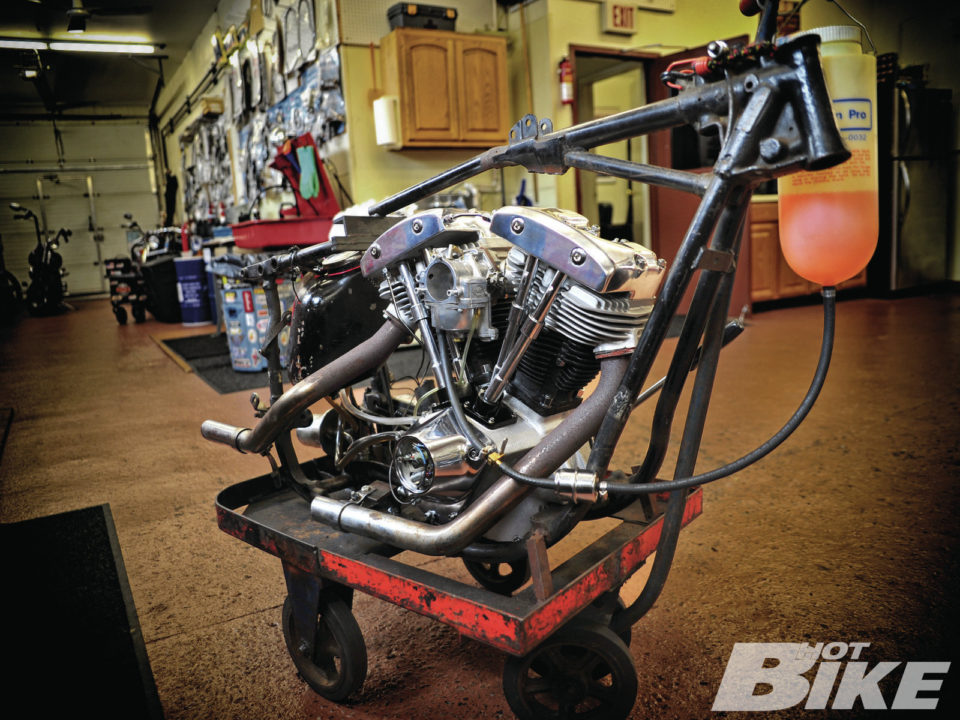
Put the intake manifold back on, mounted the cleaned-up carb. Hooked up the oil lines. Double-checked everything. Filled it up with break-in oil. Felt pretty good about it.
Rolled the bike out. Turned on the gas, gave it a couple of prime kicks. Turned the key. Gave it a solid kick and she barked right to life! Rough at first, naturally. Let it warm up a bit, listening for any bad noises. Sounded okay. Spent some time dialing in the carb, adjusting the idle. Let it run for a bit, shut it down, let it cool. Did that a few times. Changed the oil again after the first few heat cycles.
Still needs some road time and fine-tuning, but it’s running strong. That familiar Shovel sound is back. Feels good to bring one of these old machines back from the brink. It’s always a rewarding process, even with the busted knuckles and greasy hands.