
Alright, buckle up folks, because I’m about to spill the beans on my recent motorcycle overhaul project. It was a beast, but totally worth it in the end. Let me walk you through the whole shebang.
It all started when I noticed my old trusty steed was starting to sound a bit… rough. Like a grumpy bear gargling gravel. I’d been putting it off for a while, but I knew a full overhaul was in order. So, I cleared out my garage (a feat in itself!), gathered my tools, and prepared for the deep dive.
First things first, I drained all the fluids. Oil, coolant, brake fluid – the whole nine yards. Messy job, but gotta do it right. I made sure to have plenty of drain pans handy, because spills are inevitable, right? After that, I started removing the body panels. This is where labeling things comes in clutch. I used masking tape and a sharpie to mark every single piece. Trust me, you’ll thank yourself later when you’re trying to put it all back together.
Next up was the engine. I disconnected all the wiring, fuel lines, and cables. More labeling! Seriously, don’t skip this step. Then, with the help of a buddy (engines are heavy!), we pulled the engine out of the frame. It was like performing open-heart surgery on my bike. Once the engine was out, I could really get a good look at everything. I mean everything.
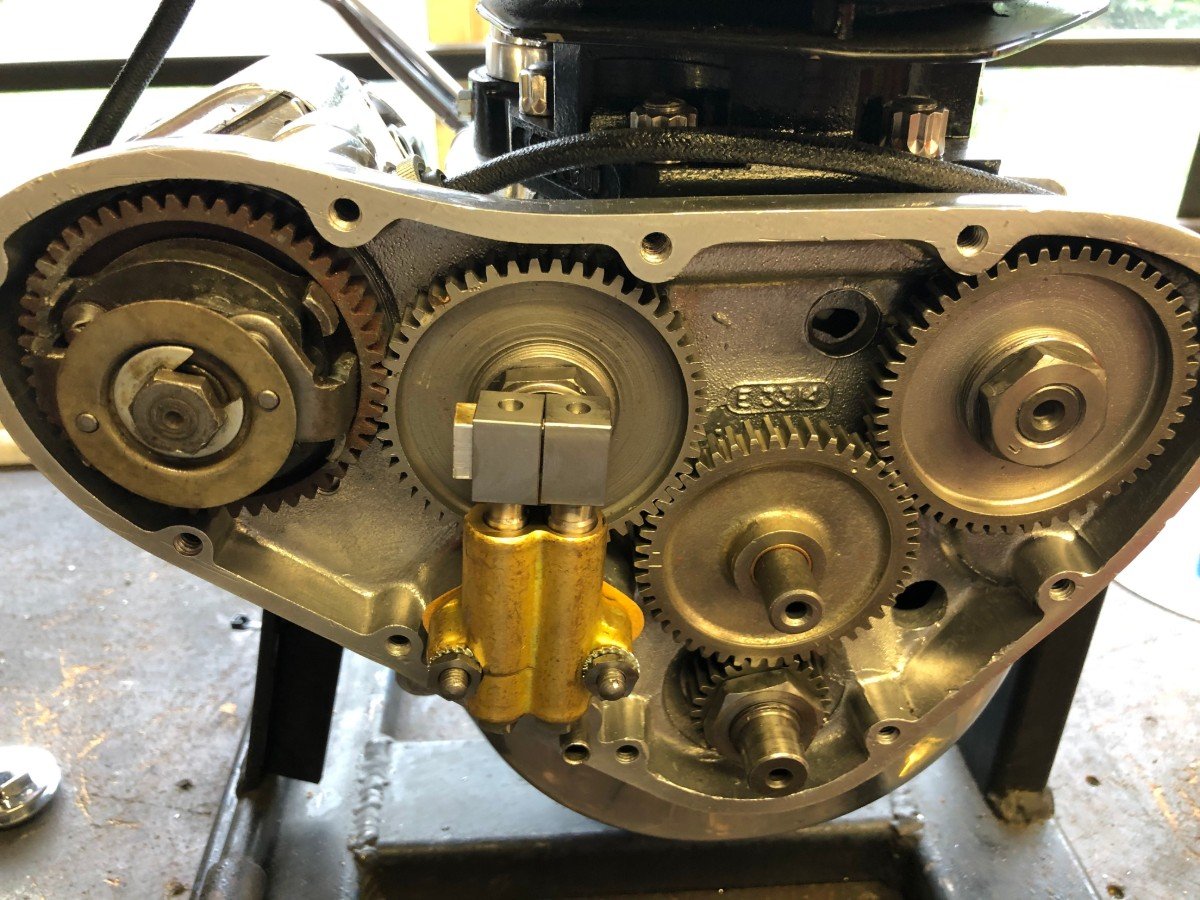
Then the real fun began, time to tear down the engine. I methodically disassembled each component, one by one. Cylinder head, pistons, crankshaft, the whole shebang. I laid everything out on a clean workbench, carefully inspecting each part for wear and tear. And boy, did I find some. The piston rings were shot, the cylinder walls were scored, and the valves were looking pretty sad. It was clear this engine had seen better days.
So, I ordered a complete engine rebuild kit, along with a few extra goodies like a high-performance camshaft and a new set of carburetors (why not, right?). While waiting for the parts to arrive, I took the time to clean every single nook and cranny of the engine components. I used a parts washer, degreaser, and a whole lot of elbow grease. It was therapeutic, in a weird way.
Once the parts arrived, it was time to rebuild the engine. I followed the service manual religiously, torqueing every bolt to the exact specifications. New piston rings, honed cylinder walls, lapped valves – the whole shebang. It was like giving the engine a new lease on life. I even took the time to port and polish the cylinder head for a little extra horsepower. Hey, gotta treat myself!
With the engine rebuilt, it was time to put it back in the frame. Again, with the help of my buddy, we carefully maneuvered the engine into place and bolted it down. I reconnected all the wiring, fuel lines, and cables, double-checking everything against my labels. And triple-checking, just to be sure. Then I installed the new carburetors and adjusted them to perfection.
After that, I refilled all the fluids, installed a new battery, and crossed my fingers. It was time for the moment of truth. I hit the starter button, and after a few cranks, the engine roared to life! It sounded amazing – smooth, powerful, and mean. I let it idle for a while to break in the new engine components, and then took it for a spin. It was like riding a brand-new bike! The throttle response was crisp, the power was smooth, and the handling was spot-on.
Finally, I reinstalled all the body panels, making sure everything lined up perfectly. It took a bit of fiddling, but I got it done. I gave the bike a thorough wash and wax, and stood back to admire my handiwork. It looked and sounded incredible. All that hard work had paid off. This motorcycle overhaul was intense, but totally worth it. It’s back on the road and running better than ever!
- Disassemble and Clean: Meticulously took apart each component.
- Rebuild and Replace: Put the engine back together with all the new parts.
- Reinstall and Refine: Put everything back together, fill fluids, test.
Tips and Tricks
Take Pictures! Before you disassemble anything, take plenty of pictures. They’ll be invaluable when you’re trying to put it all back together.
Label Everything! Masking tape and a sharpie are your best friends. Label every single part, wire, and hose.
Don’t Rush! Take your time and do it right. It’s better to spend a little extra time and get it right the first time than to have to go back and redo it later.
Get Help! Don’t be afraid to ask for help from a friend or a professional. Some tasks are just easier with an extra set of hands.
So, there you have it. My motorcycle overhaul project in a nutshell. It was a challenging but rewarding experience, and I learned a lot along the way. Now get out there and wrench on your own rides!