
Getting Started
So I decided to tackle assembling a hard hat myself after needing one for a shed build project. Didn’t wanna just buy a pre-built one, figured I could handle it. Honestly, the instructions that came with it looked kinda daunting at first glance, all technical diagrams. But I grabbed my gear box and jumped in.
The Gear Hunt
First things first, I needed to find all the bits and pieces. Dug through my toolbox and spread everything out on the garage workbench:
- The main shell piece (felt kinda flimsy empty)
- A bunch of plastic suspension bits with straps
- Tiny metal pins and those annoying little plastic clips
- The sweatband liner thing
- The adjustment knob for the back
Laid it all out just like the picture showed. Almost missed the tiny baggie with the clips stuck to the cardboard packaging – sneaky!
Putting It Together Step by Step
Started with the suspension rig. Fed one of the long straps through the plastic arms, lining up the holes. Gotta get this right or the whole thing wobbles.My thumbs hurt trying to poke those stiff plastic clips through the strap holes – took way longer than I thought! Finally got a couple snapped into place, holding the straps tight.
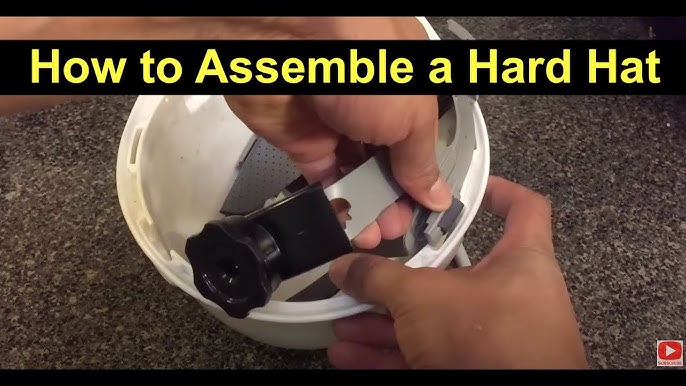
Next up, attaching that suspension frame to the actual hard hat shell. Lined up the holes on the frame with the slots inside the top of the shell. Slide, slide, click! Actually felt pretty satisfying when it locked in place on one side. Repeated it on the other side. Had to wiggle it a bit to get everything sitting flush.
Slid the sweatband piece into the channels on the suspension’s sides. It’s got these little metal rivets that clip into the fabric holes. Fiddly, but straightforward. Attached the adjustable knob at the back, just pushed the peg into the plastic slot till it clicked. Then attached the strap ends to it, feeding them through the bracket. This is where you get the head size dialed in.
Testing Time
Finally, stuck it on my head. Turned the knob at the back tight. Gave the shell a gentle whack with my knuckles – sounds solid! Did the shake test: bent over and shook my head side-to-side like a crazy person. Suspension held the shell up nice, didn’t fall off or slip down over my eyes. Success!
Final Thought
Wasn’t rocket science, but took patience wrestling with those tiny clips and straps. Instructions could be way clearer, felt like solving a puzzle. Make damn sure those suspension clips click locked before trusting it overhead though. Don’t wanna whack your head relying on flimsy assembly!