
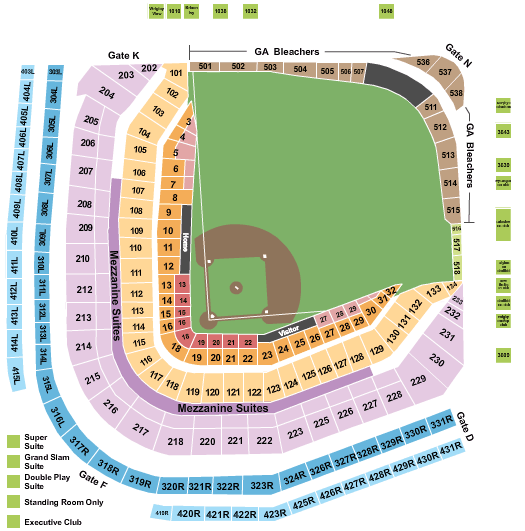
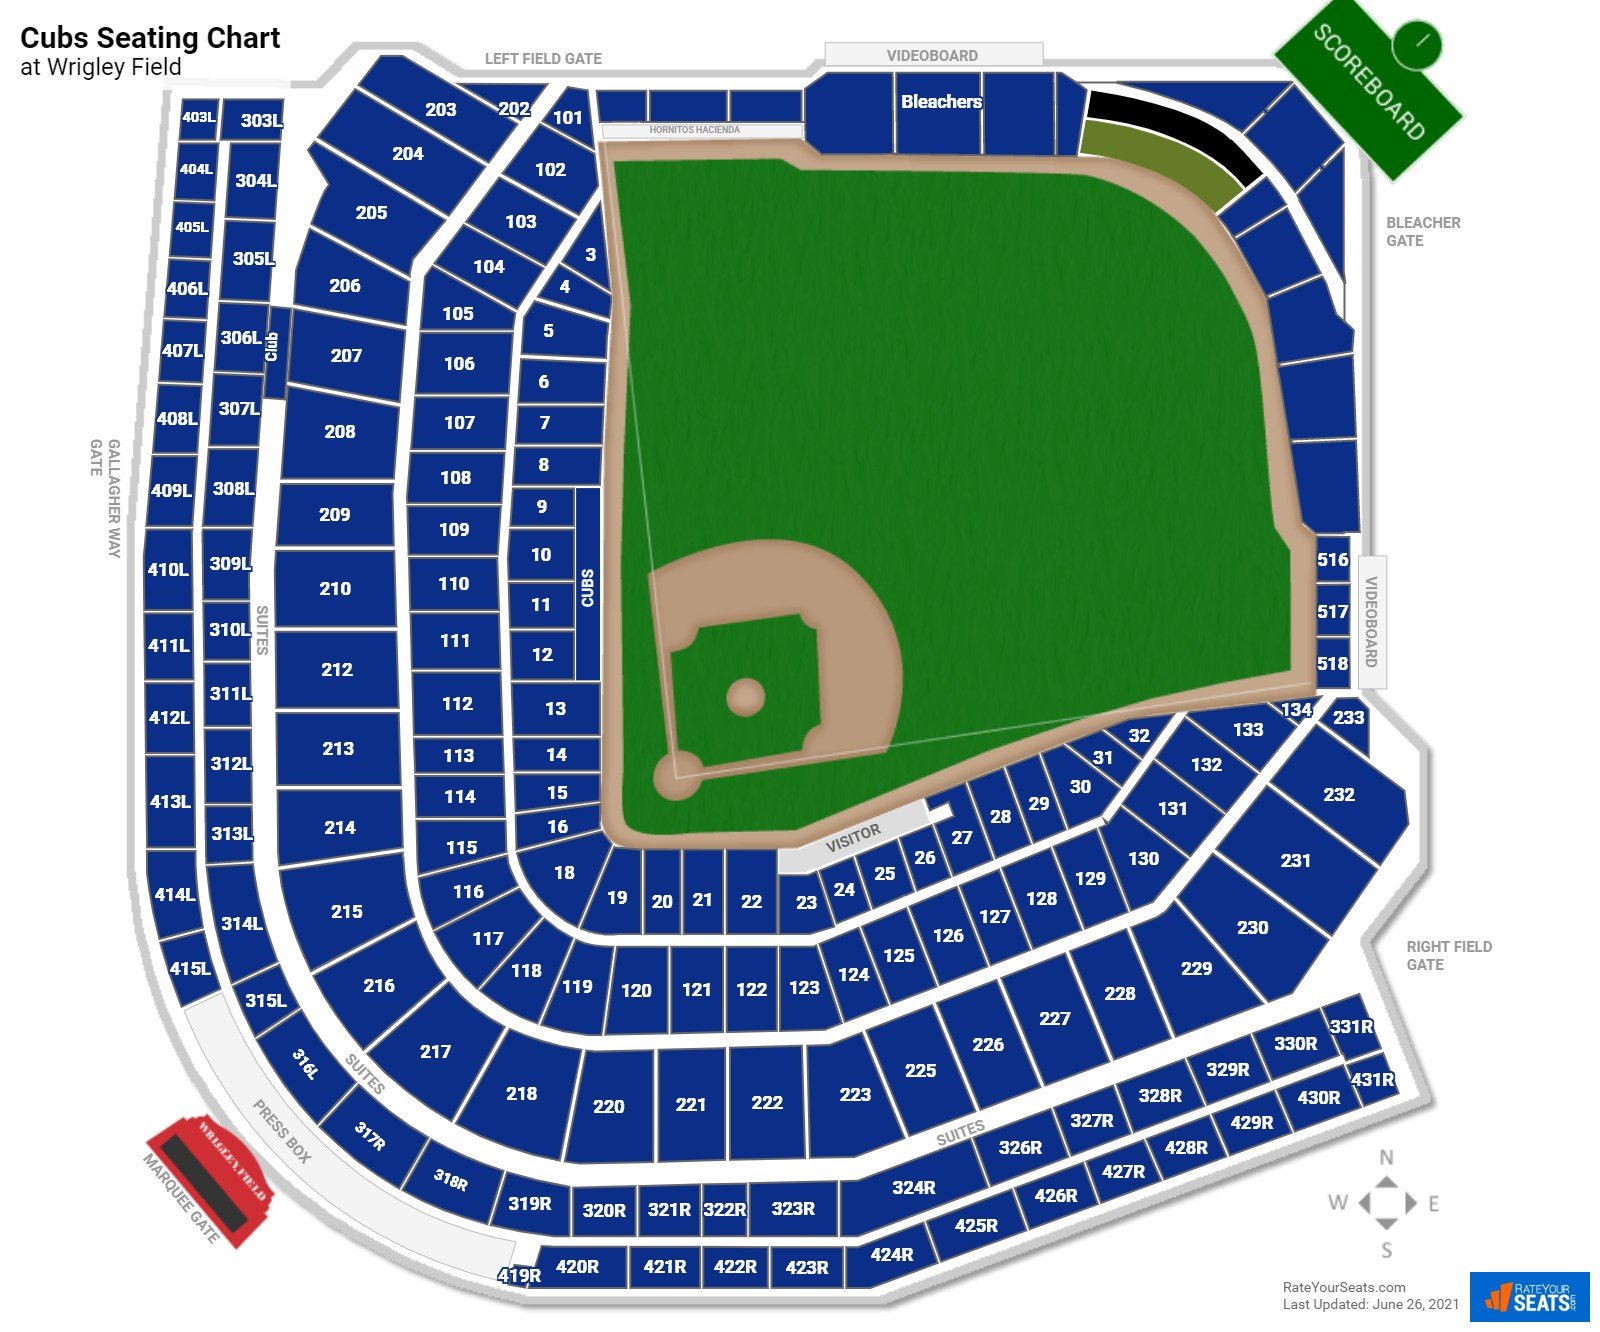
Alright, so the other day I was set on getting tickets for a Cubs game at Wrigley. It’s one of those classic ballpark experiences, right? But before I could even think about buying tickets, I knew I had to tackle the beast: the Wrigley Field seating chart. It’s an old park, full of quirks, so just picking a section blindly wasn’t an option for me.
My First Dive into the Chart Maze
So, my first move was to just type “Cubs Wrigley seating chart” into a search engine. And whoa, a bunch of options popped up. The official Cubs site had one, ticket resale sites had their own versions, and even fan blogs had some. It was a bit much at first, I gotta admit.
I started clicking around. Some charts were super basic, just colored sections. Others were interactive, which was kind of cool. My main goal was to figure out a few things:
- The View: Obviously, I wanted to see the game! I was looking for info on potential obstructions. Wrigley has those support poles, you know?
- The Price: Different sections mean different prices. I had a budget in mind.
- The Sun: For a day game, this is a big deal. Did I want to bake or be in the shade?
- The Vibe: I’d heard the bleachers are a whole different experience compared to, say, the club seats.
Getting Down to Brass Tacks
I spent a good hour or so just comparing charts. I found that the official team site’s chart was a good starting point for general layout and section numbers. Then, I hopped over to some of those big ticket marketplaces. Their trick is that they often have user-submitted photos from the seats, or at least a “view from seat” feature. That was super helpful.
I remember specifically looking at the 100-level infield seats – pricey, but great views. Then the 200-level, which seemed like a good balance. The bleachers were tempting for the atmosphere, but I also read they can get pretty intense, and you can’t see the historic scoreboard from all angles there.
A key thing I learned: pay attention to row numbers, especially in sections that might have those pesky poles. Some charts even explicitly mark “obstructed view” seats, which is a lifesaver. I also found out that the higher rows in the lower levels can sometimes have overhangs from the deck above, which could mean shade, but also a slightly cut-off view of fly balls.
Making the Call
After a lot of back-and-forth, I started to narrow it down. I cross-referenced the information from a couple of different charts. I wasn’t looking for the cheapest seats, but I also wasn’t going to spring for the most expensive. I ended up focusing on a section in the 200 level, a bit down the first base line. The charts suggested a decent view without breaking the bank, and hopefully, a good angle on the whole field.
The whole process took a bit of patience. It wasn’t like just picking a seat in a modern movie theater. Wrigley’s got character, and that character extends to its seating arrangements.
My Final Takeaway
If you’re planning a trip and looking at the Wrigley seating chart, my advice is to use a few different resources. Don’t just rely on one. Look for those interactive charts and any “view from seat” tools. And if you’re really worried about obstructions, try to find specific info about the section and row you’re considering. It takes a little homework, but it’s worth it to make sure you have a good experience at such an iconic ballpark. I actually went ahead and got my tickets based on this research, and I’m really looking forward to the game!