
Getting Started with the CB500 Twin
So, I got my hands on this old Honda CB500 Twin. It wasn’t exactly a looker, pretty beat up actually. But that twin engine, I just had a feeling, you know? Figured it’d make a real neat cafe racer. Wasn’t aiming for some perfect, shiny thing, just something with a bit of grit, something I could really ride.
First job, obviously, was to haul it into my workshop. Spent a good couple of evenings just walking around it, sipping coffee, imagining what it could be. You gotta do that, let the ideas brew a bit.
The Teardown – Getting My Hands Dirty
Alright, then came the stripping. This is where the real fun, and the mess, begins. Started pulling off all the stuff I didn’t need. And believe me, there was a lot. Those old bikes are covered in junk. Big ol’ seat, massive indicators, heavy mudguards. All of it went into a pile. The wife wasn’t too chuffed about the ever-growing mountain of scrap in the corner of the garage, haha.
- Yanked the engine out. Actually, that was easier than I expected. Good old reliable Honda design, gotta give ’em that.
- Checked the frame over. Bit of rust here and there, but nothing too scary. Solid enough for what I had in mind.
- The wiring, though. Oh boy. Looked like a bird had nested in there. Absolute chaos. Knew that was going to be a proper headache to sort out later. Always is.
Shaping the Cafe Look
I was going for that classic, low-slung cafe racer profile. That meant the back end needed some serious work. Got the angle grinder out – my favorite tool! Sparks everywhere, love it. Chopped off the old subframe and welded in a nice new hoop. I’m no master welder, mind you, my welds are more functional than pretty, but they’re strong. Good enough for this project.
Found a cheap seat on the internet. One of those universal cafe racer ones. Looked the part. Of course, “universal” never means it just bolts on. Had to fabricate some brackets, mess about with the positioning for ages to get it looking just right. Patience is what you need for this stuff. That, or a bigger hammer. Sometimes both, if I’m honest.
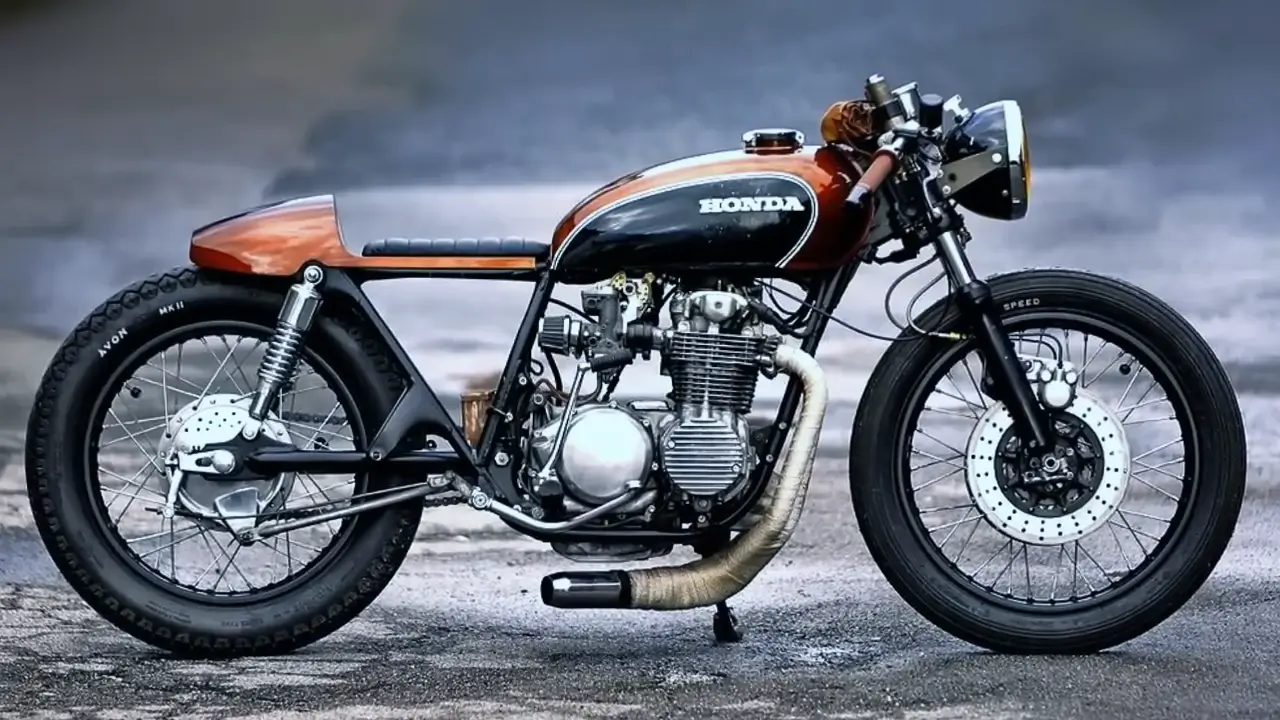
The fuel tank was the original. Had a few dents and dings, but I kinda liked the shape of it. Decided to keep it, just give it some TLC and a fresh coat of paint later on.
Engine and Guts
The engine, that’s the heart and soul of it, right? Didn’t go crazy with a full rebuild. Checked the compression, and it was surprisingly decent. So, just gave it a real good clean, new gaskets all around, fresh oil. Spent some time polishing up the engine covers too. Amazing how a bit of elbow grease and polish can make an old engine look a hundred times better.
Carbs. Ugh, carbs. Always a bit of a gamble with these old machines. Took them completely apart, cleaned every single jet and passage I could find. Put ’em back together, keeping my fingers crossed. You always have that little moment of doubt, don’t you? Wondering if it’ll actually run when you’re done.
Decided to go with pod filters. Yeah, yeah, I know what people say – they’re a nightmare to tune. And they’re not wrong. But they just look so damn cool. And let’s face it, a big part of building a cafe racer is about the looks.
Making it Roll and Stop
Suspension next. Kept the original front forks, just stripped them down, new oil, new seals. For the rear, I got some slightly shorter, stiffer shocks. Helps to give it that aggressive, hunkered-down stance. Makes it look mean, which is what we want.
Gave the wheels a thorough scrub down and treated them to some new tires. You don’t want to skimp on tires, ever. They’re the only thing connecting you to the road. Brakes were straightforward enough – new pads, fresh fluid, and a good bleed. Should be plenty to haul this thing up.
Controls and Seeing the Light
Clip-on handlebars were a must, obviously. Dropped the front end a touch by sliding the forks up through the triple clamps. Gives it that proper sporty feel. New grips, some nice simple switches. The rule for a cafe racer is less is more.
For the headlight, I went with a classic round unit. Tucked a small, neat taillight under the new seat hoop. Then came the wiring. That was a good few evenings spent with a multimeter, a wiring diagram that looked like spaghetti, and a fair bit of muttering under my breath. But eventually, got all the lights working. Felt like a small miracle, to be honest.
Exhaust system needed to have a bit of a bark. Found some short, stubby mufflers that looked the business. Wrapped the header pipes in that black exhaust wrap. Looks tough, and it stops you from getting a nasty burn on your leg. Well, most of the time.
Paint and the Final Push
Then, the paint job. Spent ages trying to decide on a color. Finally settled on a deep, metallic grey for the tank, with the frame done in satin black. Kept it simple and classic. Did it all myself with rattle cans out in the shed. It’s not a professional, showroom finish by any means, but it’s mine. Full of character, as they say.
Putting it all back together, that’s the really rewarding part. Seeing it slowly transform from a collection of bits and pieces back into a proper motorcycle. Tightening that final nut and bolt. Stepping back, taking a deep breath, and just admiring your handiwork.
She Lives!
And then, the big moment. Poured some fresh fuel in, flicked the choke on, thumbed the starter button. It coughed, it spluttered a bit, and then… BAM! It roared into life! That sound, man. After all that work. There’s no better feeling in the world. Took it out for a first proper spin. It’s raw, it’s loud, it vibrates. Pretty much exactly what a cafe racer should be.
There are still a few little bits to tweak and adjust, there always are with these custom builds. But overall, yeah, I’m pretty darn chuffed with how this Honda CB500 Twin cafe racer turned out. Took a lot of hours, a fair bit of sweat, probably a drop or two of blood along the way. But totally worth it. Every single time you build something like this, it’s worth it.